Friday, December 31, 2010
Thursday, December 30, 2010
Biscotti di Regina: Attempt #1
Every holiday season my brother-in-law has given us the most wonderful Biscotti di Regina from his neighborhood Brooklyn bakery. These cookies, also known as Queen's Biscuits, are classic Italian cookies with a sweet, cake-like texture with a crispy coating of sesame seeds. They are a traditional Italian accompaniment to wine or coffee.
This year, after finishing the entire box he gave us, I decided I'd start a quest to try to make these on my own. I took a recipe from allrecipes.com and made my first try today. The resulting cookies are quite good but definitely don't compare to the Brooklyn cookies!

This year, after finishing the entire box he gave us, I decided I'd start a quest to try to make these on my own. I took a recipe from allrecipes.com and made my first try today. The resulting cookies are quite good but definitely don't compare to the Brooklyn cookies!

I used the following recipe and have noted below where I will change the recipe next time to try to achieve a more 'Brooklyn-like' cookie:
Ingredients:
- 2 cups AP Flour
- 1/2 cup sugar
- 1.5 tsp. baking powder
- 1/8 tsp salt
- 1/4 tsp ground cardamom (I felt the cardamom flavor was much too strong with just 1/4 tsp; next time I'll halve this to 1/8 tsp.)
- 1/2 cup vegetable shortening
- 1 egg
- 1/2 tsp lemon extract (next time I'll replace this with vanilla extract)
- 1/2 cup milk
- 1/4 cup sesame seeds
- 1/2 cup heavy cream (the recipe did not call for this but I used it for brushing on the cookie for browning purposes)
Directions:
- Preheat oven to 375 degrees
- Sift together flour, sugar, baking powder, salt and cardamom in a large bowl. Cut shortening in with a pastry blender until the size of small peas (next time I'll cut in the shortening until my mixture looks like cornmeal; some of the cookies had bites of crisco the size of small peas!)
- Stir in the egg, lightly beaten with flavoring extract. Stir in milk one tablespoon at a time, mixing after each addition.
- Break dough off in small pieces and roll hands to form a log about 1.5" long. Flatten slightly and roll in sesame seeds (here is where I brushed it with the heavy cream)
- Place on parchment lined cookie sheet about 3/4" apart. Bake for 12 - 15 minutes until lightly browned.
Wednesday, December 29, 2010
Secrets to Making Macarons - Maybe There Aren't Any?
I think the only thing that helps is: Try to breathe!! Why is it I can temper chocolate blindfolded, bang out the perfect puff pastry, pipe picture-perfect stringwork, but my nervous energy goes into overdrive every time I make macarons?
I think its because 20% of the time they don't turn out as I'd like, and of the batches I do like I end up throwing out 10% of the finished product. I'm aware of my working conditions and try to control the climate in the bakery when I'm working on this amazing treat, but sometimes I just don't know why I fail. This is one I almost don't want to try to figure out and this post won't give any answers! I feel like I've studied almost every article out there on macarons and tried every method (I will say I have the best success with the Italian method). During pastry school I studied for 3 months under the some of the best pastry chefs in the world (Le Bernadin) where we made macarons for the petit fours trays, they had a higher success rate than I have but when I see experts struggling I don't feel quite as bad!

Most of the macarons in the photo above turned out quite well, but there are several I'd have to eat instead of selling to customers (check out the tan one of the left side with an extended top and the pink one above it with uneven ganache filling). Some may say this is being too much of a perfectionist, but I don't believe with macarons we should strive for anything less than perfection.
Tuesday, December 28, 2010
Our Wedding Cake Video
Yesterday I posted that we are in the middle of the season of marriage engagements. I thought I would share the following video with you that has several of our wedding creations. Enjoy!
Bogota, NJ
Monday, December 27, 2010
The Season for Engagements!

Bogota, NJ
I came across a statistic a few days ago that states 40% of all marriage engagements occur over the holidays. The reason for this is that the holidays present an abundance of opportunities for memorable proposals to take place.
I have to add myself to this statistic as I became engaged at midnight at the beginning of the new millennium. Just like so many other brides-to-be, the very next day I was surfing the internet for information and running out to the newsstand to buy every bridal magazine there is. Six months later we were married in Las Vegas with 50+ of our friends and family in attendance (and, no, Elvis did not perform the ceremony!).
Looking at the statistics on our website and blog it looks like many of the newly engaged couples are doing the same thing I did. The most popular search term coming into the blog is "Engagement Cakes" followed closely by "Wedding Cake Designs."
So a big congratulations to all those recently engaged couples (and those that will become engaged on New Year's Eve!).
Sunday, December 26, 2010
Black and White Birthday Cake - NJ Bakery

Bogota, New Jersey
Our client came to us requesting a 70th birthday party cake and wanted the following elements incorporated into the design: black and white films, family, sudoku, bowling and gardening! At first, adding all these elements in a creative way was a bit intimidating, but once the creative juices started flowing it all came together in a cohesive fashion.
We used a graphics program to create a simple sudoku and made a black and white film strip with photos of her children and grandchildren. These images were then printed on frosting paper using edible ink and applied to the cake with a few dabs of water.
The '70' topper was made using sugarpaste and an exacto knife several days in advance to allow drying time. Once it was dry we painted it with silver luster dust and sprinkled edible glitter to add a little extra bang! The bowling pins/ball and plunger flowers were also made from sugarpaste.
Overall we were quite pleased with how all the elements worked together in this cake and, more importantly, the client loved it!
Saturday, December 25, 2010
Happy Holidays from Confectionary Designs!
Please view our holiday card created for all our readers!
Friday, December 24, 2010
Daring Bakers' Challenge - Stollen

The 2010 December Daring Bakers’ challenge was hosted by Penny of Sweet Sadie’s Baking. She challenged the Daring Bakers’ to make Stollen. She adapted a friend’s family recipe and combined it with techniques from Peter Reinhart and Martha Stewart’s demonstration. Stollen is a bread-like fruitcake made with yeast, water and flour, and usually with zest added to the dough. Candied citrus peels are often also added.
I followed Penny's recipe with only a few exceptions. My goal was to incorporate two favorite flavor combinations: orange and chocolate. The following are the changes I made:
- I doubled the orange zest in the dough and omitted the lemon zest.
- The only candied citrus peels I used were orange (used a total of 1 orange rind).
- For the dried fruits, I used raisins and cranberries soaked in Grand Marnier.
- I used 2 ounces of finely grated chocolate (72%).
Unfortunately, the stollen never made it out of the house as my husband and I were the only ones who got to sample it! For several days we sliced off little pieces and ate it all ourselves. In conclusion, my thoughts on the stollen and my changes were as follows:
- When I first came across the challenge I didn't think I'd like it as much as I did. My favorite part was the several layers of butter and powdered sugar applied to the crust.
- The next time I make this wonderful treat I'll add about an ounce more of grated chocolate. The chocolate did come through in the final product, but I think a little more would complement the orange and cinnamon even nicer.
UPDATE: we added a YouTube video with step-by-step instructions! Additionally you may view our printable recipe on our new site.


Thursday, December 23, 2010
Holiday Dove Cookies

We have two days left until Christmas and some of my 'guaranteed to arrive by Dec. 23rd' packages still haven't arrived. Well, the day isn't over yet so I'm keeping my fingers crossed else I may be one of those people you see at the mall a few hours before it closes on Christmas Eve!
In the meantime, we are still whipping up batches of various cookies to spread cheer in our bakery's neighborhood! The cookies above are full of glitter and the chocolate sugar cookie recipe is a nice change of taste from our basic sugar cookie. The almond extract complements the chocolate taste of these cookies perfectly!
Ingredients:
- 2 3/4 cups all purpose flour
- 3/4 cup cocoa powder (Dutch processed)
- 1/2 teaspoon salt
- 1/2 teaspoon baking powder
- 1 cup unsalted butter, room temperature
- 1 3/4 cups granulated sugar
- 2 eggs
- 2 tsp almond extract
Directions
- Whisk together the flour, cocoa powder, salt, and baking powder.
- Beat the butter and sugar until light and fluffy.
- Add the eggs, one at a time, beating well after each addition.
- Add the almond extract and beat until combined.
- Add the flour mixture and mix until just incorporated.
- Wrap the dough in plastic wrap and chill in refrigerator for about an hour.
- Preheat oven to 350 degrees F.
- Roll out your cookies and cut out shapes using desired cutters.
- Bake cookies for 10 - 12 minutes (depending on the size of your shapes).
- Let cool and decorate as desired.
Wednesday, December 22, 2010
NJ Wedding Cake and Fondant Recipe

Bergen County Bakery
This cake was created for an elegant yet intimate wedding. We came up with the design based on the bride's dress and bouquet. The dress had slight accents of gold and was covered in beautiful beads. Her bouquet consisted of lilies and greenery so we came up with a design of sugarpaste flowers for this cake.
Usually for all our cakes we use premade Satin Ice rolled fondant which we find is very consistent and easy to use. For this cake we used a marshmallow fondant (see recipe below). Although the cake looked wonderful, we did find the 'home-made' fondant much more work and not as consistent as our tried and true Satin Ice.
Ingredients
- 10.5 ounce bag of marshmallows
- 1 tsp flavoring of choice - optional (vanilla, almond, etc...)
- 2 lbs sifted Confectioners Sugar
- 3 Tbsp Water
- Place marshmallows in a microwave safe container and melt on medium heat until just melted (about 45 seconds).
- Add the water and flavoring of choice and stir with a wooden spoon coated with shortening.
- Add 1/2 the confectioners sugar and mix well; add the other half and mix until incorporated. (note: you may also use your stand mixer with the dough attachment for this step)
- Lightly grease your counter top with shortening and kneed until slightly stiff.
- Wrap in plastic wrap slightly oiled with vegetable oil. Let rest for 24 hours.
Tuesday, December 21, 2010
No Snow for New Jersey!!

Bergen County New Jersey
Our weatherman was so wrong when he warned us we may be in for a big snowstorm this past weekend. Well, here it is Tuesday, still sunny and no snow. I'm not putting away the snow shovels and boots yet as we still have a long winter to look forward to! Don't get me wrong, I love snow as much as the next person as I'm an avid snowboarder, skier, and snowshoer! But give me the choice and I'll hop a plane to Utah to enjoy the wonderful fluffy playground - I just don't want to drive in it.
The only snowflakes I'm in the mood for right now are the ones in the oven at the bakery! We are making our cookie baskets for our neighborhood businesses and I'm sure they will also appreciate these snowflakes! We used our tried and true sugar cookie recipe for these snowflakes - minimizing the rising agents in this recipe help the cookie keep its shape during baking. This recipe takes any flavoring nicely so to stay in the spirit of the season we used peppermint in the cookies and the glace icing.
The snowflake cookie cutter we use has endless possibilities with all the little cutouts included. After all, no two snowflakes are alike, right?!
Monday, December 20, 2010
Petit Fours - Mini Frangipane Cakes

Bergen County, NJ
Petit fours are the perfect desserts for a casual gathering or towards the end of a cocktail party. Petit fours is translated from French to English as 'little ovens' but I think it should be 'little miracle.'
Our company, Confectionary Designs, is often hired to cater dessert bars for corporate gatherings. We find having a selection of several little desserts works much better than slices of cake. People like walking up to a dessert bar, seeing a beautiful arraignment of treats and having a wide variety of choices!
To make the little decadent treats above use our Frangipane Cake recipe baked in sheet pans. Cut out pieces of the cake using cutters no larger than an inch. Sandwich three pieces of cake together with apricot or raspberry jam.
Sunday, December 19, 2010
Custom Mocha Cupcakes

Bogota, NJ
At our NJ bakery we love getting orders for custom cupcakes! Whether the client wants something cute and whimsical for a baby shower or an elegant tower for a wedding.
When we come up with a design for our cupcakes it almost always includes a wrapper. The wrappers can be ordered from specialty shops online or you can make your own. We usually prefer to make our own because it gives us more leeway for personalization. The wrappers above are a simple cutout using a Cricut machine and cardstock. The machine also enables us to do more complicated designs like lace patterns and cutouts (e.g. butterflies, flowers, etc....).
The cupcakes above are for a chocolate and coffee lover. I'm often asked how we make our wonderful mocha frosting but can never give an exact recipe as we make it to taste based on the client's request for a more chocolaty or coffee flavor. Generally what we do is whip up a batch of Swiss meringue and in the final stages of mixing add espresso powder, rich chocolate ganache, and a little kahlua to taste.
Saturday, December 18, 2010
NYC KISS FM Holiday Party

DJ Shaila with Gelisa and Pam
We were thrilled when celebrity Chef Jessie asked us to provide a dessert bar for the KISS FM holiday party at their headquarters in NYC! We immediately went to work to come up with a variety of 'pop in your mouth' sweets to please every palate. We came up with the following menu and every last morsel was gone by the end of the party:
- Sweet and Salty Chocolate Chip Cookies
- Raspberry French Macaroons
- Cake Truffles (Red Velvet, Pistachio, Spice)
- Apricot/Almond and Chocolate Biscotti
- Thumbprint Hazelnut Cookies with Praline Ganache Filling
- Decorated Chocolate Holiday Cake with KISS FM logo
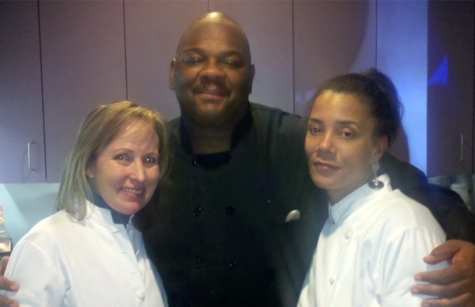
Chef Jessie with Pam and me
Friday, December 17, 2010
A Summer Wedding Cake - NJ Bakery

Bogota, NJ
In New Jersey we received our first dusting of snow a few days ago and the weatherman says we should be getting hit with a big storm on Sunday. Looks like we'll be breaking out the shovels at the bakery this weekend!
As I was driving home today I was missing the warmer weather so I decided to break out a picture from last summer of one of our seashore wedding cakes. We loved making this cake and it was featured in 201Bride magazine. Everything you see is edible from the royal icing coral to the chocolate shells.
I hope you feel a little 'warmer' after viewing this cake!
Thursday, December 16, 2010
Wedding Favor Sugar Cookies - NJ Bakery

Bogota, NJ
At Confectionary Designs (a New Jersey bakery) we encourage our brides to provide edible favors for thier guests, whether this be a bag of spiced nuts, a box of our famous truffles, or a sugar cookie designed just for them. The cookie above is a mini replica of the couple's wedding cake and it looked lovely in a clear cello bag with a ribbon.
We have a favorite sugar cookie recipe that we find works perfectly everytime:
Ingredients:
3 cups flour
1 cup unsalted butter, softened
1 cups granulated sugar1 cup unsalted butter, softened
1 egg
1 tsp. extract (e.g. vanilla, almond, pear, etc...)
1/2 tsp salt
Directions:
- With the paddle attachment on your mixer cream butter and sugar until light and fluffy.
- Add egg and flavoring extract of your choice and mix until incorporated
- Sift dry ingredients together and mix just until the dough holds together.
- Chill dough for at least an hour; roll out to desired thickness and cut out your cookies
- Bake at 350 degrees F for about 8 - 10 minutes
- Let cool and decorate as desire.
Wednesday, December 15, 2010
Ganache Birthday Cake - NJ Bakery

Bogota, NJ
Fondant cakes seem to be the rage these days and it is not often we get an order for a poured ganache cake. It is a nice deviation from the norm when we receive a ganache cake order as it is a completely different process we go through from design to decorating.
Even as a trained pastry chef who has poured ganache over a cake more times than I can count, I admit a still get a bit nervous when the moment to pour comes! The meringue buttercream can't be too warm or too cold, the ganache needs to be the perfect temperature and consistency, else I'll end up with a puddle of chocolate, and plenty of streaks and bubbles.
Regardless of the above, I love the look and taste of a nicely poured ganache cake. The cake pictured above is decorated with gumpaste hydrangeas and the scrolls were completed with a glace icing which complements the sheen of the ganache perfectly!
Glacé Icing:
1 lb powdered sugar
6 Tbsp whole milk or water
6 Tbsp light Corn Syrup
1 tsp flavoring extract of your choice
Combine sugar and milk and mix until smooth; add corn syrup and extract. Let icing sit for about an hour before using.
Tuesday, December 14, 2010
A Birthday Bus - NJ Cakes

Bogota, NJ
This cake was a bit of a challenge like most of the 3D cakes we do. Luckily the recipient provided us with a toy model of his bus for us to work from so we were able to incorporate every little detail, down to the windshield wipers! In order to get his logo exact, we used a graphics program to create the logo and cut it out using sugarpaste on our Cricut .
.
The cake is a delicious, moist Red Velvet cake with Cream Cheese filling and White Chocolate ganache icing.
Monday, December 13, 2010
Sweet Sixteen Topsy Turvy - NJ Cakes

Bogota, NJ
In order to please as many palates as possible, both tiers are a different flavor. The top tier is yellow cake with praline filling and the bottom tier is our popular chocolate cake with cannoli filling (see recipe below).
Cannoli Filling:
Ingredients:
- 1 lb. Ricotta Impastata
- 1/4 lb. confectioners' sugar
- 1 tsp. vanilla extract
- 1/2 tsp cinnamon
- 1 oz. chopped semisweet chocolate
- Beat the ricotta and sugar until smooth
- Add the vanilla and cinnamon and mix until incorporated
- Fold in the chopped chocolate
Sunday, December 12, 2010
Louis Vuitton Purse Cake - NJ Cakes

Bogota, NJ
Owning a bakery certainly has it's advantages; one being you have gifts for your friends on hand, only problem being is you need to assemble those gifts in a clever way!
This LV purse cake was made for a dear friend as a gift at her milestone birthday bash. The recipient is a big-time fashionista and her husband asked us to make a purse cake for her, and we were happy to fulfil his request.
The LV symbols were hand-painted (took a lot of time and a really steady hand to do this!). The main lesson I learned in making this cake is to make two sets of sugar paste handles - yes, they do break!!
All the tiers are made with our yellow cake recipe and a delicious coffee buttercream (see recipe below - use caution as you will be working with very hot sugar!)
Coffee Buttercream:
Ingredients:
6 large egg yolks
1 cup sugar
4 fluid ounces water
2 cups unsalted butter
1 tsp. Kahlua (or other coffee flavored liqueur)
2 tablespoons instant espresso powder dissolved in 1 teaspoon boiling water
Instructions:
- Beat the egg yolks in a mixer fitted with the whisk attachment until light in color.
- Combine sugar in water in a small saucepan bring to a boil over medium heat washing the sides down occasionally with a pastry brush dipped in water (this is to prevent crystallization)
- Remove pan from heat when the syrup reaches 238 degrees F
- With the mixer running, very carefully pour the syrup into the egg yolks in a steady stream down the side of the bowl (do not pour onto the beaters).
- Continue to whisk the mixture until the side of the mixer bowl is just slightly warm; change to the paddle attachment and add the butter pieces.
- Continue to mix for about 5 minutes (the buttercream may look curdled at first, this is OK).
- Add the coffee and liqueur and mix until fully incorporated
Saturday, December 11, 2010
Hazelnut Pastries Wrapped in Filo
A few days ago I wanted to use up some leftover dates from the Cocoa challenge and I made a date pastry wrapped in filo dough. Well, today I had leftover filo dough and wanted to use it up (this could be a never ending cycle!!). Again, I went back to my book Le Cordon Bleu Dessert Techniques and found a yummy sounding recipe that would also use some of my leftover chocolate and hazelnuts from the chocolate-filled dates.
My husband and I both loved the pastries, but I agreed with his suggestion to use a coffee-flavored liqueur instead of the chocolate-flavored. Coffee would definitely complement this delightful petits fours.
Hazelnut Pastries
Ingredients:

My husband and I both loved the pastries, but I agreed with his suggestion to use a coffee-flavored liqueur instead of the chocolate-flavored. Coffee would definitely complement this delightful petits fours.
Hazelnut Pastries
Ingredients:
- Filo pastry sheets
- 1 Tbsp powdered sugar
- 1 Tbsp chocolate liqueur (I like to use Godiva)
- 2.5 ounces grated bittersweet chocolate
- 3/4 cup finely chopped hazelnuts
- Honey for finishing (optional)
- Combine hazelnuts, powdered sugar, chocolate liqueur and chocolate for the filling
- Cut out 3.5" squares of filo pastry
- Place some of the filling in the middle of the filo and wrap; gather the edges of the pastry to seal
- Bake at 325F for 10 - 12 minutes
- Heat honey to the boiling point and brush over the cooked pastries (optional)


Friday, December 10, 2010
NJ Wedding Cakes - White Velvet Cake Recipe

Bogota, NJ
One of the best parts of running a custom bakery is coming up with designs that fit the client, the venue, and the overall affair. The above cake just says "winter wedding" to me! OK - so there are no snowflakes, or sugar paste elves, but my partner did a great job designing this wedding cake for a very elegant, black-tie wedding. This white cake with black and super-pearl accents looked perfect on the cake table and complemented the classic decor.
So often we hear from clients "I want a simple cake" - this often makes me cringe as simple is often harder to do than a decorative cake. There is no room for error as the fondant and all the accents must be perfect because you can't hide anything!
All three tiers are made from our White Velvet Cake recipe which produces a wonderful, velvety texture. We needed to make 6 batches to complete the above cake. That's when a 20-quart mixer and 5-rack oven come in handy!
White Velvet Cake:
Ingredients
1 1/2 cups butter, room temp
1 1/2 cups granulated sugar
2 large eggs
1 cup buttermilk
1 teaspoon baking soda
2 cups all-purpose flour
1/2 teaspoon salt
Directions
1. Preheat oven to 325 degrees F . Grease and flour 2-8 inch" round pans
2. Sift the flour and salt together and set aside.
3. Cream butter and sugar until light and fluffy.
4. Add eggs one at a time and mix well.
5. Dissolve baking soda in buttermilk.
6. Alternately add flour and buttermilk, beginning and ending with the flour.
7. Bake for about 30 minutes, or until toothpick inserted into cake comes out clean. Cool cake,
Thursday, December 9, 2010
Pistachio White Chocolate Biscotti

For about 15 years I had two biscotti recipes that I kept returning to: one for apricot-almond biscotti and one for chocolate biscotti with white chocolate chips. I tried many other recipes but none of them compared to my tried-and-true. That is until today!!
I spend a bit of time browsing the internet for recipes and came across one that caught my eye by Tyler Florence on the Food Network site. I saw Pistachio Biscotti and figured since pistachios are nuts the gods created just for me, why not try yet another biscotti recipe :)
Of course, a pastry chef can't just take a recipe as we need to tweek it a little, right? I decided to add white chocolate chunks to to the recipe (love pistachios and white chocolate combos), increase the salt, and use pistachio extract instead of vanilla. Pistachio extract isn't commonly found in grocery stores, so I'm sure the result would still be quite wonderful with vanilla extract.
Pistachio White Chocolate Biscotti
Ingredients:
- 1.25 cups roasted pistachios
- 1/2 cup white chocolate chips
- 1/2 cup unsalted butter, softened
- 3 eggs
- 1 teaspoon pistachio (or vanilla) extract
- 1 cup sugar
- 3.5 cups AP flour
- 1 teaspoon baking powder
- 1 teaspoon salt
- Preheat oven to 350F
- Beat the butter until light and fluffy
- Gradually add the eggs, sugar, and pistachio extract and mix until creamed
- Add the flour, baking powder and salt mixing until just incorporated
- Using a spatula, mix in the pistachios and white chips until evenly distributed
- Divide the dough in half and roll each half into a log (12" long by 1" high)
- Place the logs on a parchment-lined baking sheet and bake for approximately 35 minutes or until lightly browned.
- Let the logs cool for about 15 minutes (you want the logs just slightly warm when you cut slices)
- Slice each log ona diagonal into 1" thick pieces
- Place each cookie on a parchment-lined cookie sheet and bake for 8 minutes
- Turn the cookies over and bake the other side for another 8 minutes
- Let cool slightly and remove from pans
- Pour large cup of coffee or tea and eat entire batch before anyone gets home!

Wednesday, December 8, 2010
From Pencil to Pastry: NJ Birthday Cakes

Bogota, NJ
When Confectionary Designs first opened it's doors in Northern, NJ, I had a vision we would be the cutting edge bakery regarding technology. After spending over 20 years in the Technology field my thought was "automate everything!" from inventory to finances to customer orders.
So when it came to creating a rendition of a custom cake for the client, I rolled up my sleeves and starting using the latest and greatest graphic program. WRONG - stop right there!! My partner pointed out to me that our customers get a special feeling when they see a hand-drawn rendition of their soon-to-be cake.
There is the question whether we are bakers or artists first - in my opinion, neither outweighs the other - we are bakers AND artists. Our customers know we are making their cakes by hand and so it follows we should also be sketching their cakes by hand and that is the philosophy that our company has adopted.
I enjoy comparing the original sketch given to the client to the finished product. In the Betty Boop birthday cake above there is almost no deviation from the original drawing. This is the case with many of our cakes, but it does happen that as we are working on a cake we just know a banner would look better in 3D, or we need more roses to fill up a section, or a bead border will look better than a shell border, etc... and so we do some real-time design right on the cakes themselves.
Tuesday, December 7, 2010
Cinnamon Date Petits Fours
I enjoyed making the chocolate hazelnut dates for yesterday's post, but the only problem is I had about 15 leftover dates. OK - so I could have popped them in mouth all day long, but I decided to dust off an old book and look for recipes. The pastry gods must have been smiling on me as I opened the book and, voila!, there was a recipe for Cinnamon Date Pastries on the first page I opened to.
The book this recipe is taken from is Le Cordon Bleu Dessert Techniques .
.
Cinnamon Date Petits Fours:
Ingredients:


The book this recipe is taken from is Le Cordon Bleu Dessert Techniques
Cinnamon Date Petits Fours:
Ingredients:
- 2/3 cup stoned and chopped medjool dates
- 2 Tbsp. finely chopped almonds
- 1 tsp. powdered sugar
- 1/2 tsp. ground cinnamon
- 2 tsp brandy
- Filo pastry sheets
- butter for finishing
- Make the filling by combining the dates, ground almonds, powdered sugar, cinnamon and brandy
- Cut 4" x 2" filo strips
- Fold in the long edges and brush the length with butter
- Place the filling at one end and roll up

- Brush with butter
- Bake at 350F for 10 minutes
- Cool and dust with powdered sugar

Monday, December 6, 2010
Chocolate Praline Stuffed Dates
"We Should Cocoa" posted a challenge for the month of December to blog about a recipe with chocolate and dates. This challenge is hosted by Choclette so a big 'thank you' shout out for making me think what I would like to submit. Although I am a pastry chef, I focus most of my efforts on baking and at first assumed I would use dates in my baking (cookies, cakes, breads, etc...). Since a date is such a wonderful alternative to a processed sugary snack, I decided to use them in their natural form.
Dates are naturally sweet and are high in fiber, magnesium and potassium. The Medjool date is considered to be the finest date grown in the world and this recipe even further enhances it's taste (and nutritional value!).
The recipe that follows will create a wonderful 'pop in your mouth' snack that fits in well with holiday dessert trays. The ganache beurre praline filling enhances the sweetness of the date and adds a slightly nutty flavor. The toasted hazelnuts add some crunch to this snack.

To make these dates you will need the following:
- 24 Medjool dates
- Handful of hazelnuts
- Ganache beurre praline (recipe below)
- Toast hazelnuts, let cool, and chop finely
- Make the Rich Ganache (6 ounces semisweet chocolate; 4 ounces heavy cream)
- Cut chocolate into fine pieces
- Bring cream to a boil over medium heat and pour over chocolate; let set for 3 minutes
- Whisk until smooth
- Cool to room temperature
- Make the Ganache Beurre Praline (Rich Ganache from above, 2 oz softened butter, 3 oz praline paste)
- Beat butter with paddle until soft and light
- Beat in praline paste
- Scrape bowl and paddle
- Add cooled rich ganache and beat until smooth (about 1 minute
- With a sharp knife make a slit on one side of each date and remove pit

- Fill pastry bag with ganache beurre praline and fill each date with mixture


- Sprinkle chopped, toasted hazelnuts over the filling
- Enjoy!!
Sunday, December 5, 2010
Christening Cake - Lemons and Raspberries

Bogota, NJ
Both tiers are a lightly-flavored Lemon Cake filled with Raspberry Meringue.
Lemon Cake: (note: this recipe can be halved to bake 2-8" pans)
- 8 oz. unsalted butter, room temperature
- 20 oz. cake flour
- 2 Tbsp. baking powder
- 1 tsp. salt
- 24 oz granulated sugar
- 4 tsp. lemon zest
- 1 tsp. lemon extract
- 20 fluid oz. whole milk
- 8 fluid oz. egg whites (about 8 large)
- Preheat oven to 350F; butter and line baking pans (we used 2-10" and 2-7" pans)
- Sift the cake flour, baking powder and salt together; set aside
- Cream the butter and sugar until light and fluffy; beat in the lemon zest and extract
- In a separate bowl, whisk together the milk and egg whites
- Add one third of the flour mixture to the butter and sugar and beat lightly; scrape down bowl; beat in half the milk and egg mixture; add another third of the flour mixture and mix until incorporated; add the remaining milk and egg mixture and mix until incorporated; add the rest of the flour mixture and beat until just absorbed.
- Fill pans about 1/2 full (if using 2" pans) and bake for approximately 35 minutes, or until a toothpick inserted in the center emerges clean.
- Cool layers for about 10 minutes, invert onto racks to cool
Saturday, December 4, 2010
Buche De Noel: The History and Recipe

The Buche de Noel is a wonderful traditional French dessert. The origins of this pastry can be found in the ancient Celtic tradition of celebrating the winter solstice. On this shortest day of the year, the Celts would search for a large trunk and burn it as a symbol of the rebirth of the sun. During the Middle Ages the ceremony of the burning log became more detailed as the logs would be decorated with ribbons and greenery.
It is generally accepted this pastry came to life when Napoleon issued a proclamation that all of Paris keep their chimneys closed during the winter because the cool air caused medical problems. This prohibited Parisians to use their fireplaces. But the French bakers then invented this dessert as a symbolic substitution around which the family could gather for story-telling and other holiday happiness.
To make this wonderful holiday display you will need the following:
- Chocolate Genoise (1 half-sheet pan): see recipe below; the key to making a successful Buche De Noel is the texture of the cake must be flexible enough to roll
- Coffee Buttercream (I like to use Swiss meringue)
- Simple Syrup (coffee flavored): combine 1/2 cup sugar, 1/2 cup water, and 1 Tbsp Kaluha in a small saucepan; bring to a boil and let cool
- Marzipan and food coloring for decorations
Chocolate Genoise Cake: (makes 2 half sheet pans)
Whole eggs: 3/4 pint
Egg yolks: 1/4 pintSalt: pinch
Sugar: 8 ounces
Cake flour: 4 ounces
Cocoa powder: 1.5 ounces
Cornstarch: 1.5 ounces
Baking soda: 1/4 teaspoon
Use the Genoise Sponge Mixing method:
1. Combine eggs, sugar, and salt and warm slightly over simmering water whisking constantly (note: do not heat too much or too quickly else you will have sweet scrambled eggs! Stop heating when the sugar just begins to melt and the eggs feel slightly warm to the touch)
2. Whip eggs on high spead until very light and thick (this process can take up to several minutes).

Your egg foam should look like the consistency in the above photo
3. Sift dry ingredients4. Sift and fold dry ingredients into egg foam in three additions. Make sure all flour is incorporated and be careful not to deflate.

6. Place pans on cooling racks and let cool for 5 - 10 minutes and turn out to cool completely
7. Trim the genoise to remove any rough or crispy edges and put on a piece of parchment or a tea towel
8. Using a pastry brush, apply simple syrup generously to genoise
9. Spread a thin layer of the coffee buttercream on the genoise
10. Using your towel or parchment, roll up the genoise tightly from the long end. Wrap and refridgerate until firm.
11. Once firm, trim the edges of the cake at a diagonal, cutting one edge about 2 inches away from the end. Position this piece on top of the Buche.
12. Cover with buttercream and use a fork to make impressions.
13. Decorate as desired with marzipan pieces (e.g. mushrooms, berries and holly, powdered sugar for snow, etc...).
Friday, December 3, 2010
Sables Korova - "Easy to Eat" Chocolate Cookies
I've always thought there are two ways to eat Sables (aka 'Sandies'):
- Take a bite and let the buttery goodness melt in your mouth!
- Take a bite and chew it - you're mouth will feel that 'sandy' texture so make sure you have a glass of milk nearby to truly enjoy the experience!
Most of us are familiar with the packaged Pecan Sandies in the cookie aisle. This recipe is taken from Pierre Herme who has been dubbed 'the Emperor of Pastry.' The bits of chocolate scattered through the cookie make them extra special for that melt in your mouth goodness!

Ingredients:
175 grams AP flour
30 grams Dutch-processed cocoa powder
1/2 tsp. baking soda
150 grams unsalted butter, room temperature
120 grams light brown sugar
50 grams sugar
1/2 tsp. fleur de sel or 1/4 tsp. sea salt
1 tsp. vanilla extract
150 grams chopped bittersweet chocolate
Directions:
1. Sift flour, cocoa, and baking soda together
2. Cream butter and both sugars in a mixing bowl until light and creamy
3. Mix in the vanilla and salt
4. Reduce mixer to low and add the dry ingredients until incorporated (the dough will look crumbly); mix in the chocolate pieces using a spatula
5. Turn the dough onto a work surface and divide in half; shape each half into a log 1.5" in diameter

6. Wrap the logs in plastic wrap and chill for at least 2 hours (may be kept in the freezer for 1 month)

7. When ready to bake, preheat oven to 325F (165C); line 2 baking sheets with parchment or a silpat
8. Slice off pieces that are 1/2" thick; place on the lined pan leaving 1 inch space between them.

9. Bake each sheet for about 12 minutes. The cookies will not look done nor will they be firm. Let cool slightly and transfer to a cooling rack.
10. Pour a big glass of milk or coffee and enjoy!!
Subscribe to:
Posts (Atom)